

Add and edit a contact
Add a customer by hand, fill in their details, custom fields and tags, and keep notes on them.
People who write to you become contacts by themselves. Add someone by hand when they reached you another way, such as a phone call or a walk-in, so you can message them and keep their details together.
Add a contact
- In Contacts, click Add Contact.
- Fill in the Phone number with the country code, such as +91 for India. It is the only required field.
- Add their Name, Email and Company if you know them.
- If you have more than one WhatsApp number, choose under Belongs to which one the contact belongs to. The people who run that number will see them.
- Fill in any Custom fields your workspace uses, and click the Tags that apply.
- Click Create.
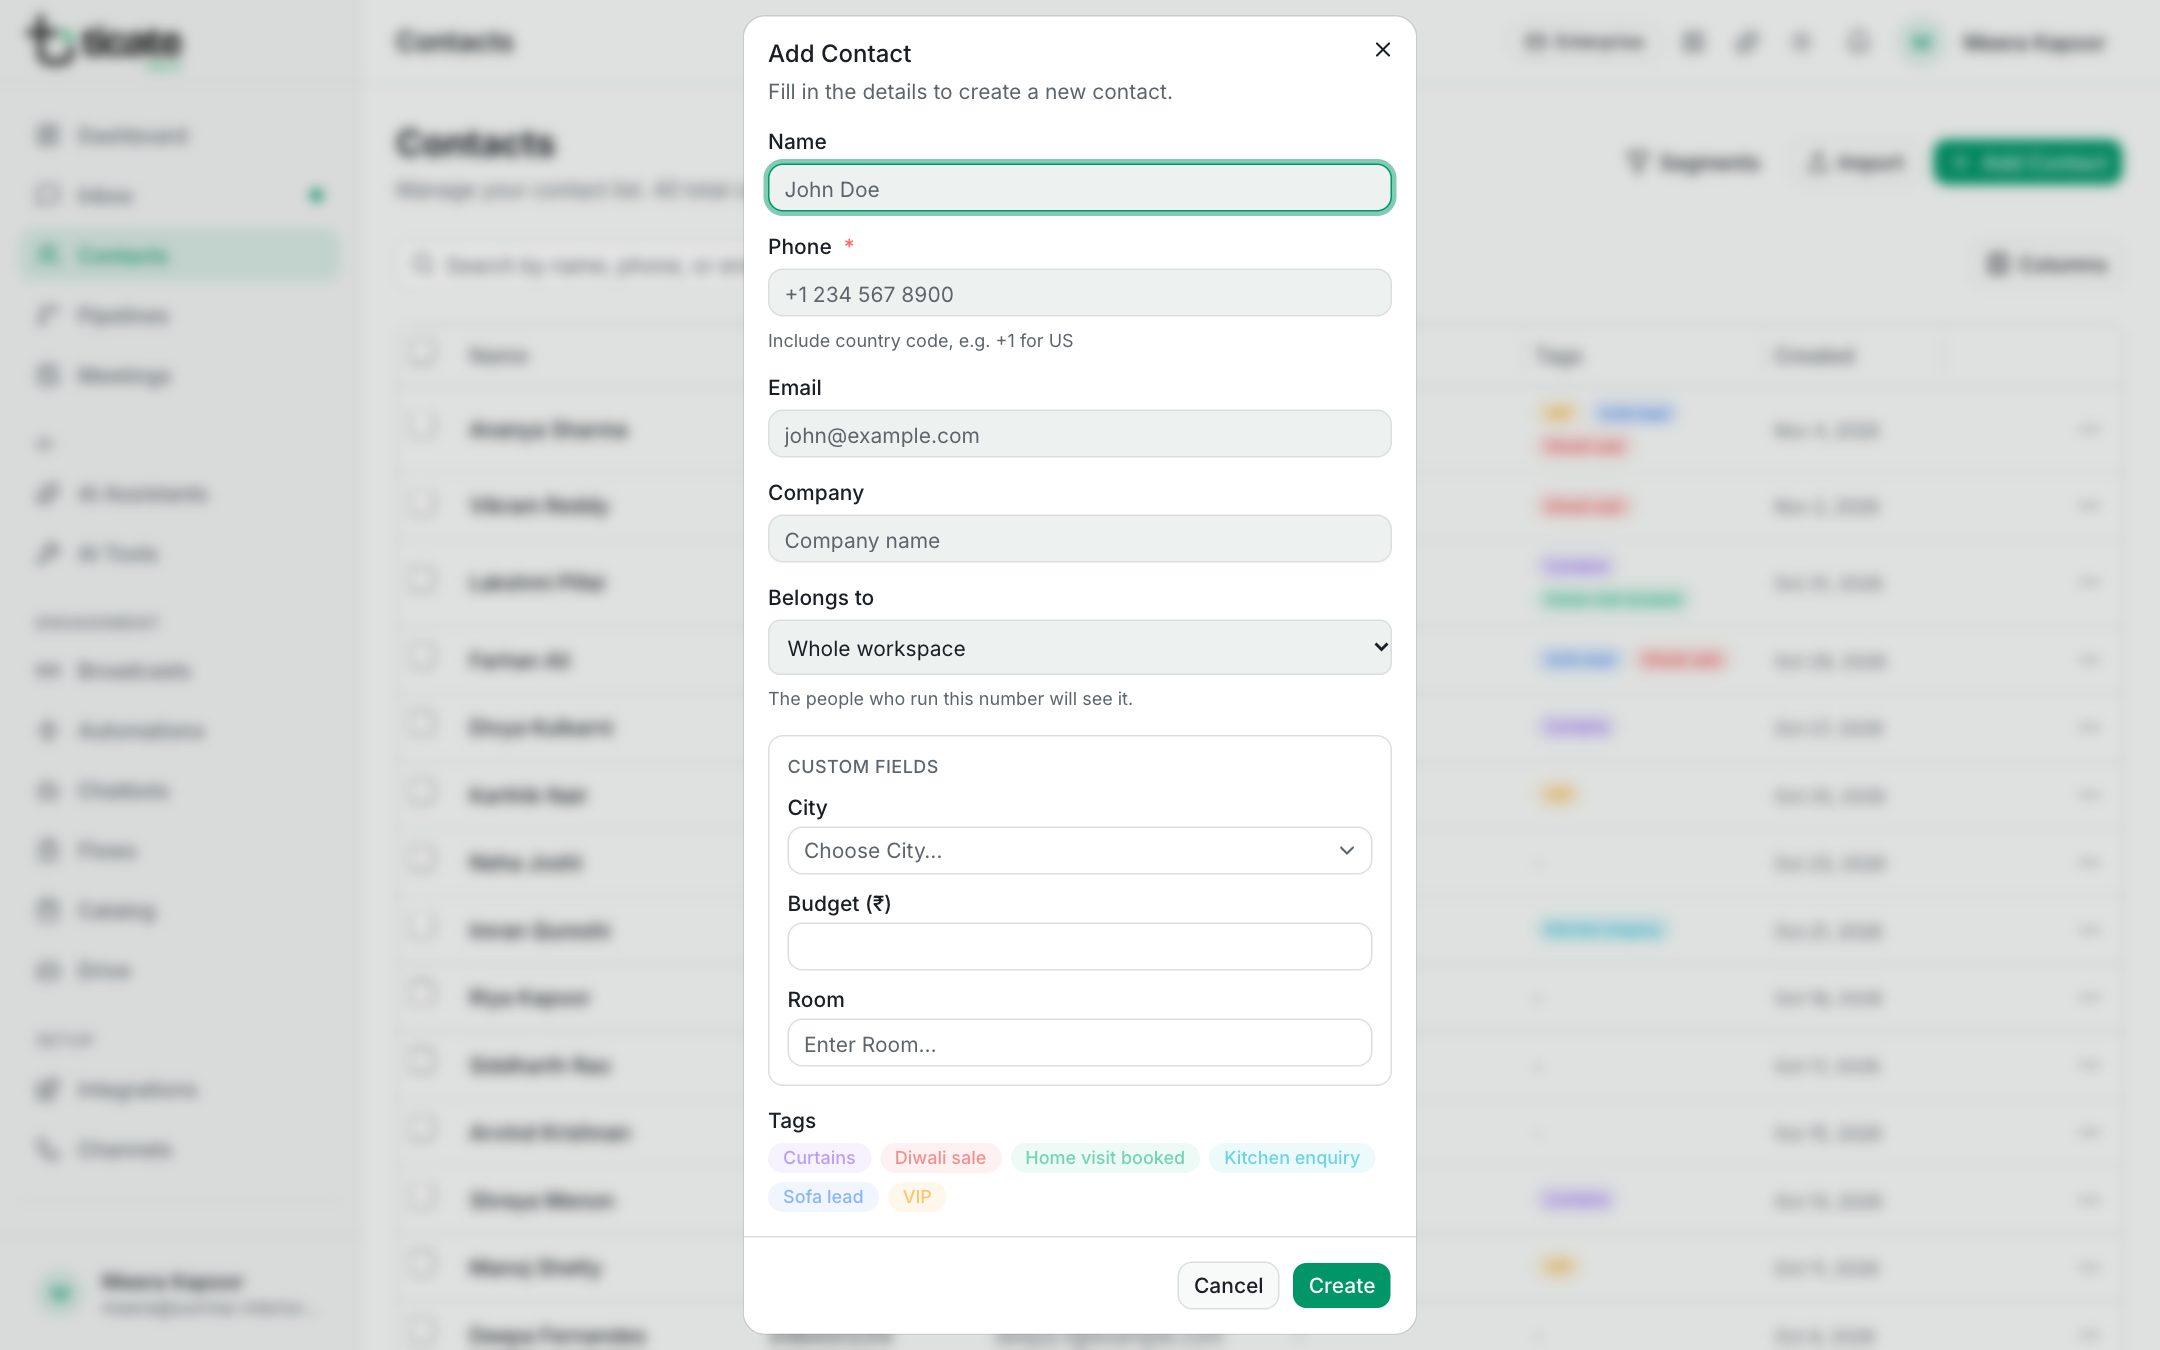
To write to the new contact, see Message a customer first.
Open a contact's details
Click a contact in the list. Their details open on the right, with their number (click it to copy), email and company at the top, and four tabs:
- Details: their marketing consent, Name, phone, Email, Company and custom fields. Change anything and click Save Changes.
- Tags: click a tag to add it to the contact or take it off.
- Notes: notes about the customer for your team. Type one and add it; hover over a note to delete it. These are the same notes as in the panel beside their chat.
- Deals: the customer's deals across your pipelines. See Deals.
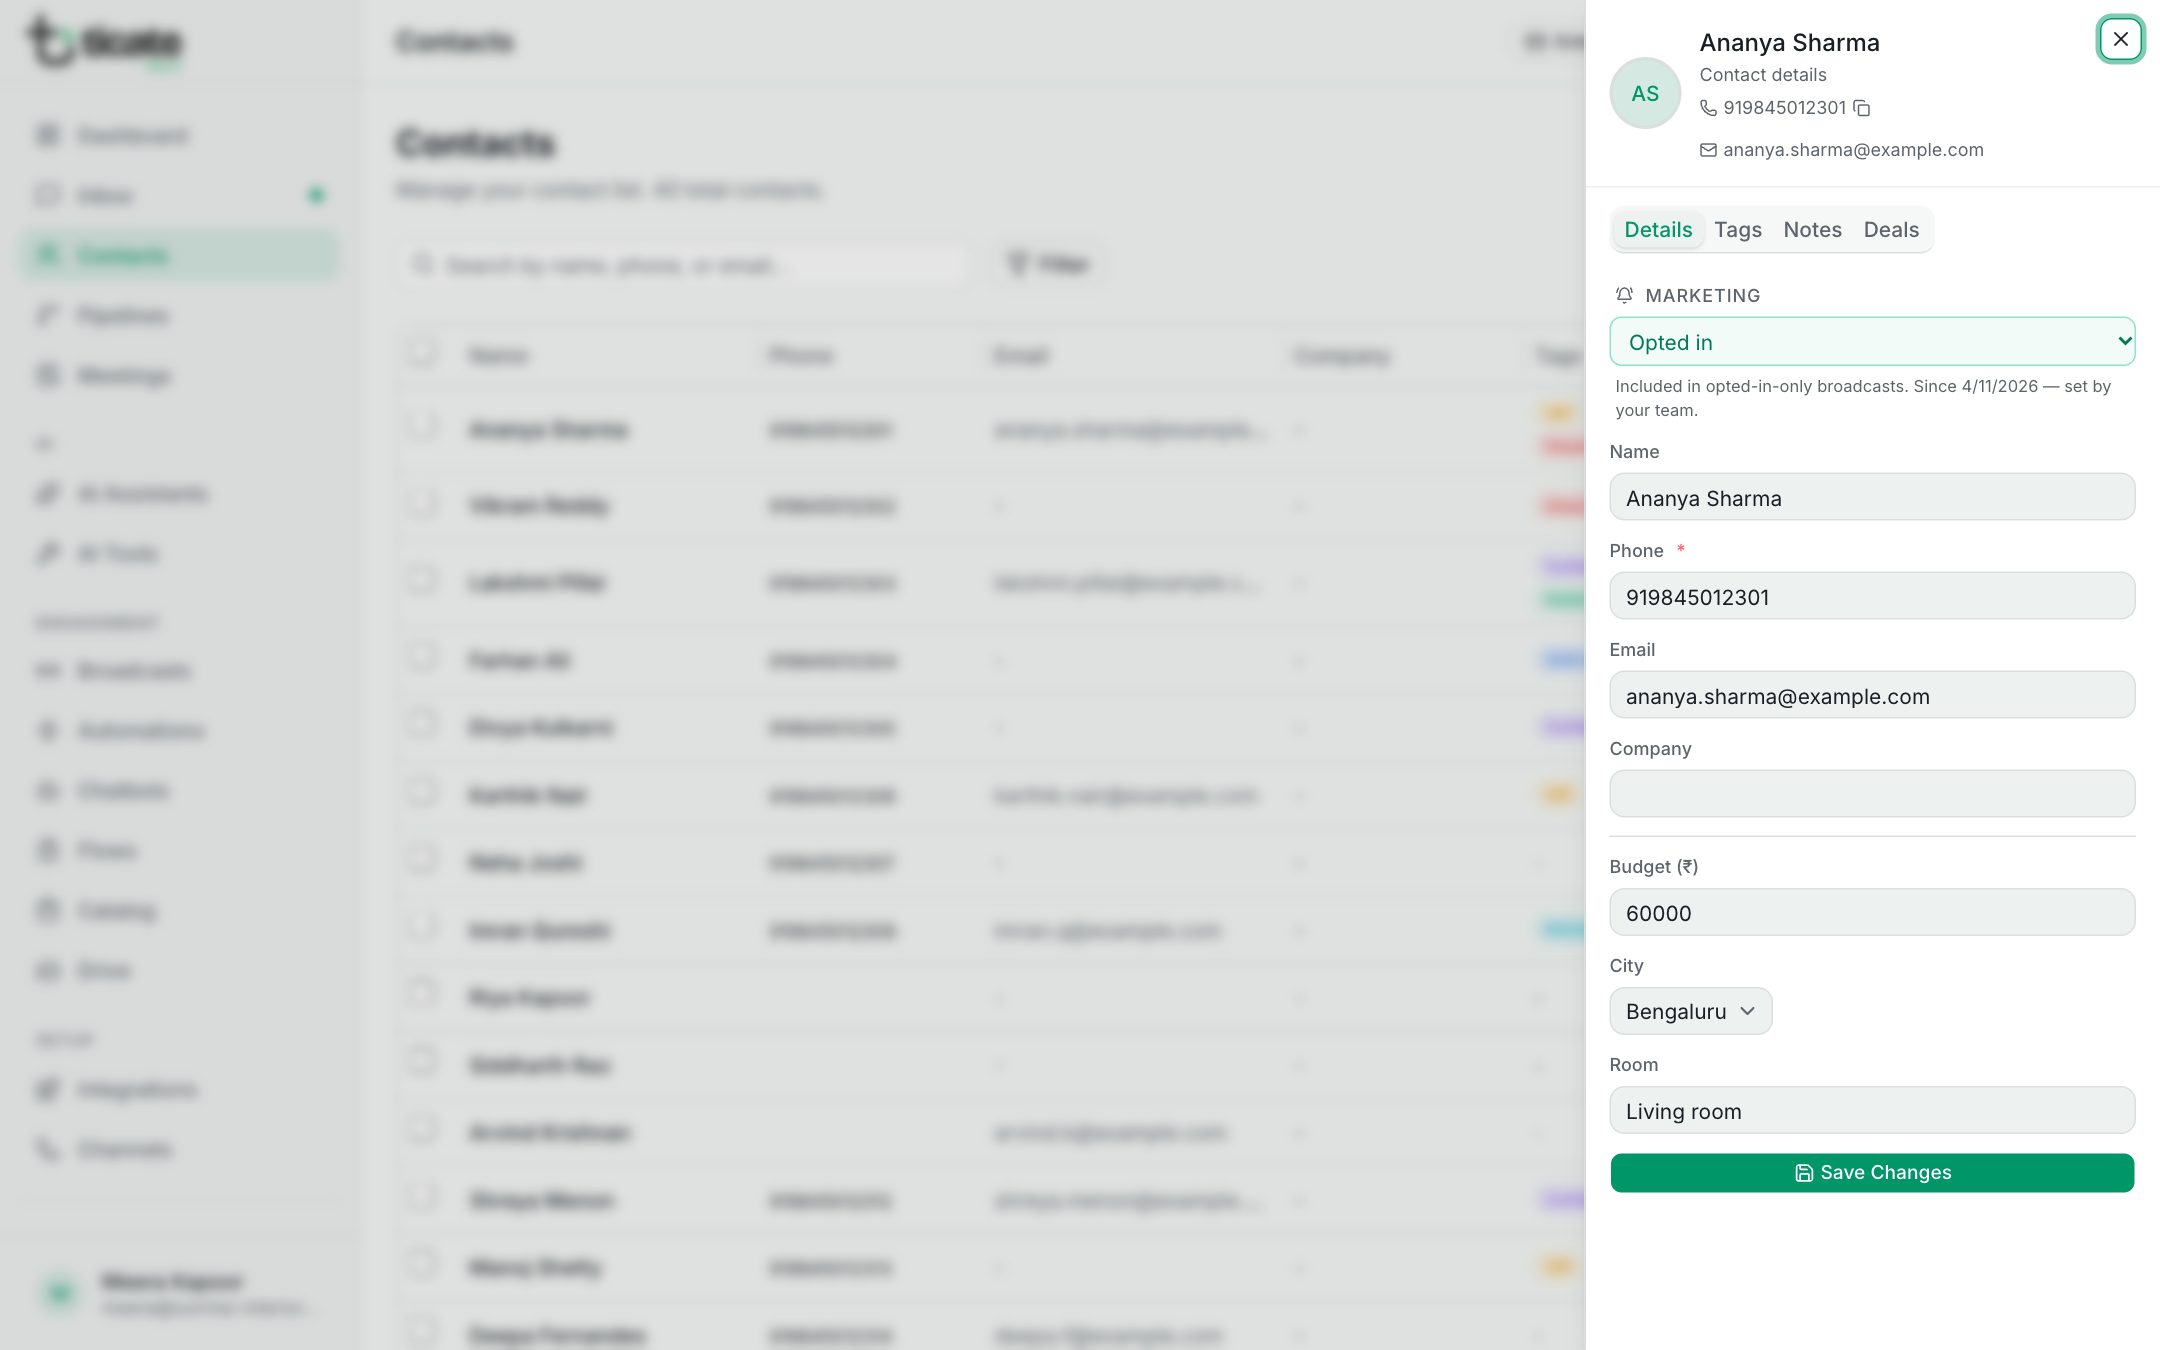
You can also change a contact from the list: open the menu at the end of their row and choose Edit, then Update.
Custom fields and tags
Custom fields hold whatever your business needs to know, such as City, Budget or Date of birth. Tags sort contacts into groups, such as VIP or Wholesale. Both are created under Settings: Settings → Custom fields and Settings → Tags. See Tags.
You can also fill in fields and tags from the panel beside a chat; see The customer panel beside a chat.